Navigation
This section describes how to log into and navigate PERA including the user Dashboard, searching and sorting options, and general information for all modules.
The video below provides an overview of navigation. Alternatively, select a button to jump to the section or continue scrolling to read more.
Content
Icons

Dashboard
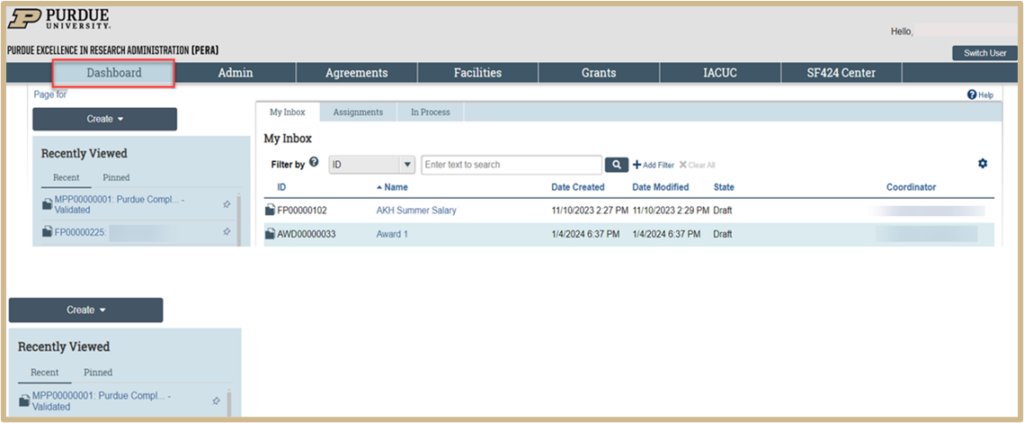
After logging in to the PERA system, you will be brought to your Dashboard. Your Dashboard is the starting point for finding items that need your attention and performing basic tasks.
Navigating the Dashboard

1. My Inbox: This tab acts as your to-do list and contains records from PERA that require your action such as Funding Proposals, Awards, and Agreements. To access a record, click on the record ID or Name. All projects in the Draft or Pre-Submission state will appear on the My Inbox tab although action may not be required from you at that time.
2. My Reviews: This tab contains items assigned for review. These are subset of the items in My Inbox and only users with reviewing roles, such as the Specialist or Department Reviewer, will use this tab.
3. Create menu and buttons: Actions that can be performed from your Dashboard, including Create New Study and initiate a Report New Information form.
4. Recently Viewed:
- Recent: You will find a list of the last items you viewed.
- Pinned: Pin an item if you need quick access.
5. My Deadlines: View current and approaching deadlines. Deadlines that are due or past due will appear in red. Upcoming deadlines will appear in orange.
6. Filter Search: Search using text, dates, names, or IDs.
7. Personalize Table: View different tables by clicking the Personalize Table Gear icon.
From your Dashboard, you can identify what actions are needed.
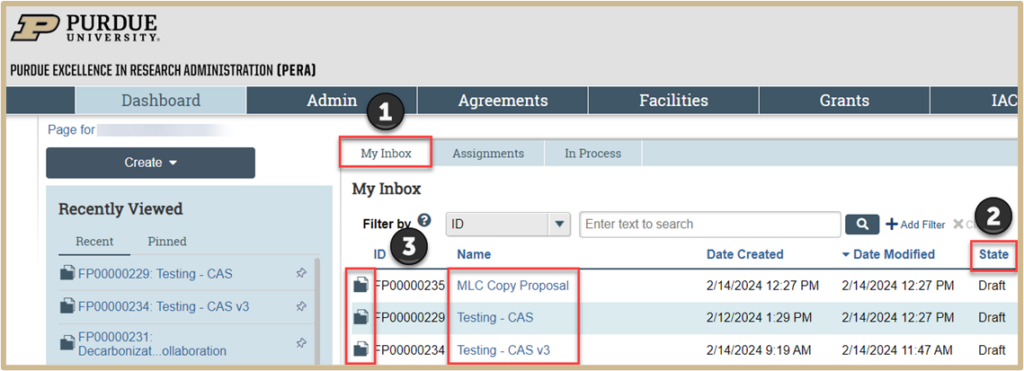
1. From your Dashboard, you can identify if there are any actions needing your attention by reviewing the state of your submission in My Inbox.
2. The state of a submission gives a clue as to what to do next. For example, “Pre-Submission” means you haven’t submitted the study, and “Clarification Requested” means that you are being asked to provide additional information on your pending submission.
3. To open your submission and continue working on it, select either the folder icon or the name of your study.
Workspace
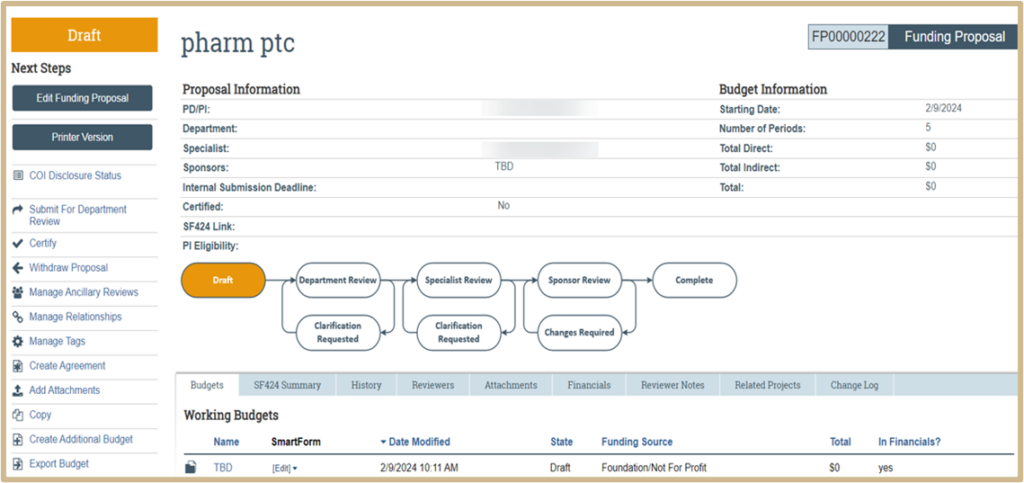
Once you open your submission, you will be led to your Workspace. Your Workspace allows you to edit your application, submit forms, assign ancillary reviewers, and view the history of your submission. The image below is an example. Your module Workspace may look slightly different.
Workspace Submission Flow
The submission workflow allows you to track the progress of your submission.
This is just one workflow example, and the buttons may vary within different modules.

Workspace Proposal Labels
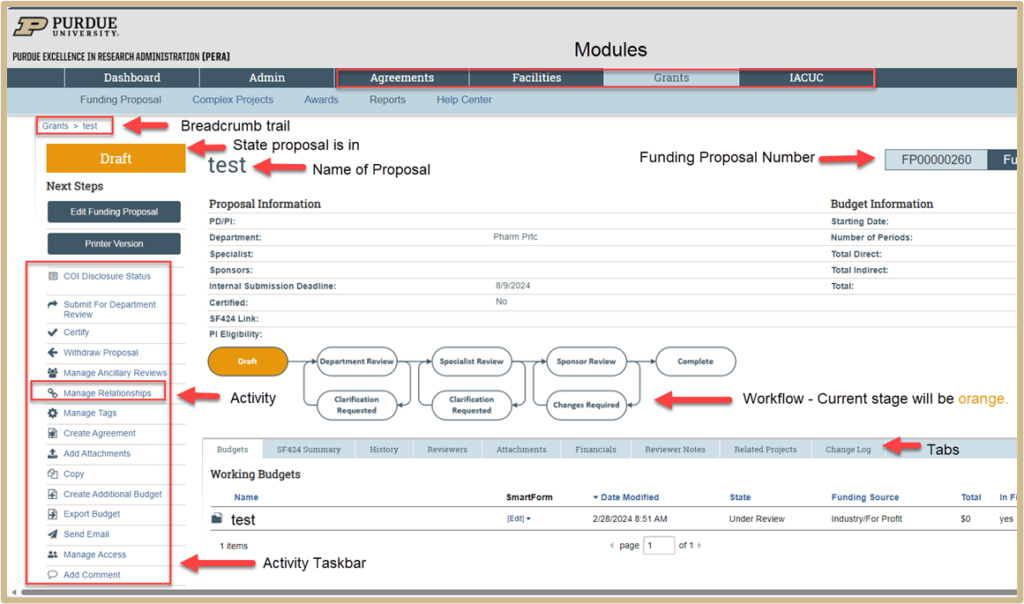
This is what you will see when you click on a Proposal you’ve already started.
Finding Options from a Single Select Menu

If you are having difficulty finding what option you need from a single select menu, press Control F.
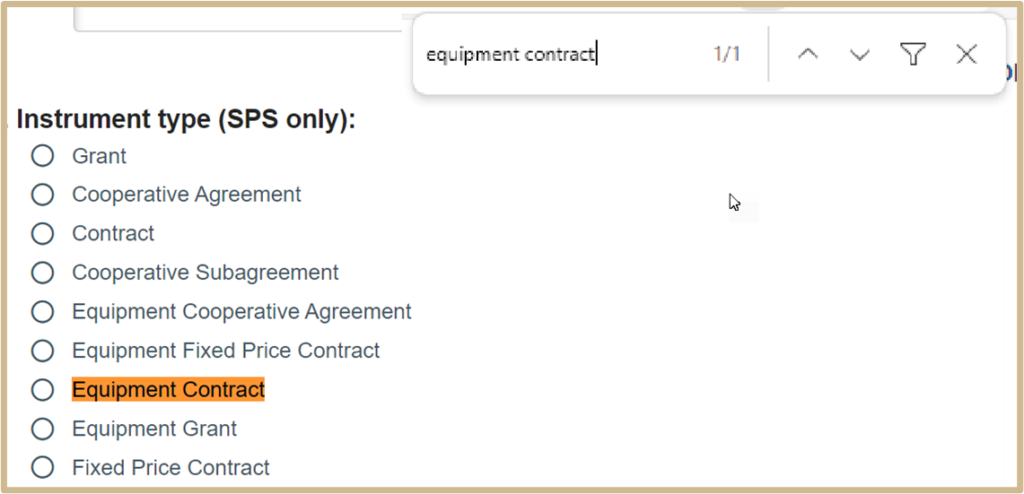
A pop-up will appear in the top right-hand corner of the screen.
Begin typing in your option.
If your option is there, it will be highlighted. Click the highlighted choice you need.
Content Updated:
