Just in Time (JIT)
Process Overview
When a sponsor requires more details or modifications to a proposal (after initial submission), the sponsor will send a Just In Time (JIT) request to either the Principal Investigator (PI), Business Office, or Sponsored Program Services (SPS).
If the PI is informed of the need for JIT information, they must ask SPS to designate the Funding Proposal as requiring JIT changes.
If SPS receives notification of the need for JIT information, they will ask the PI for the necessary JIT details.
Roles
- The Launch Team will complete all Just In Time (JIT) requests
- Principal Investigators will provide assistance with completing necessary documentation
- Pre-Award will be consulted for proposal clarification as needed
- Contracting will complete redlines/dual review of agreements as needed

How to Submit a Just in Time Request
Step 1: Locate the funding proposal record for this JIT request.
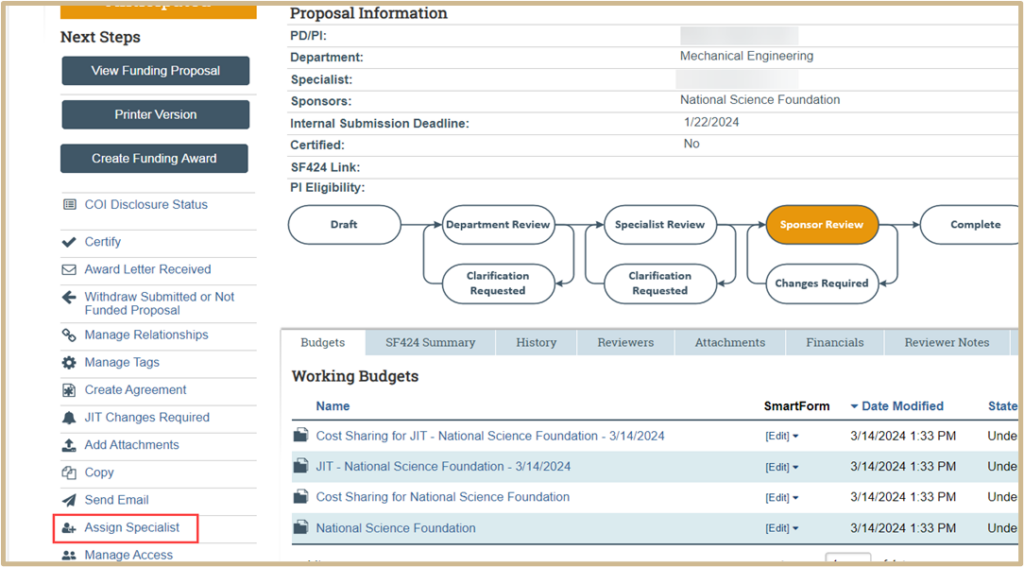
Step 2: Click on Assign Specialist and move the specialist to the Launch Administrator who would be completing the activity. Next, click OK.

Step 3: Click on Manage Access and add the Launch Administrator with edit rights. When finished, click OK.
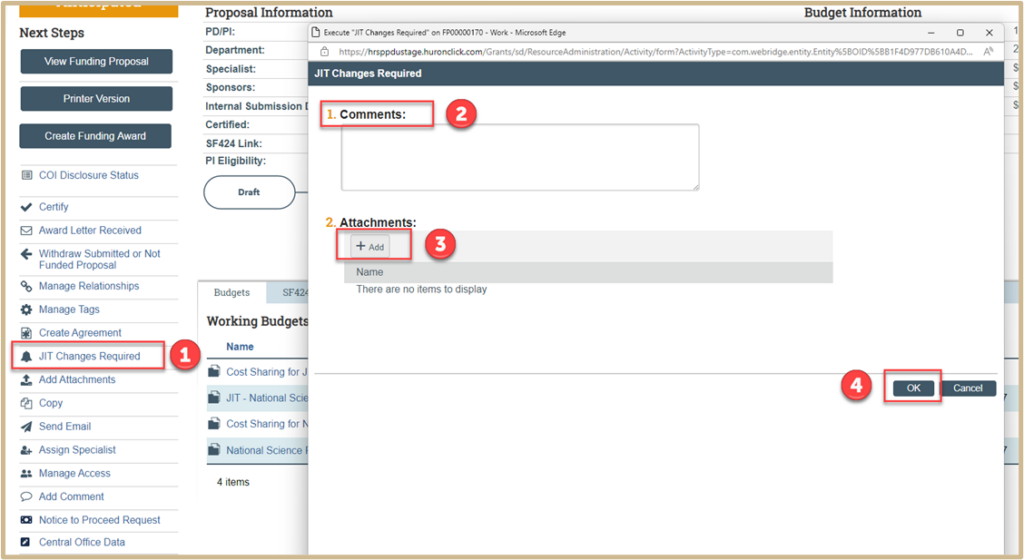
Step 4: Click on JIT Changes Required and add comments as needed. The initial comment should be “JIT Received- whatever the request needs”.
For example: “JIT Received- Sponsor requested revised budget and updated C&P.” Click +Add to attach documents or drag and drop. Once finished, click OK.
If the JIT request requires Contracting review, the Launch Administrator will Send Email via PERA. Please see the Post Award Intake Processes Guide for more information.
![]() NOTE
NOTE
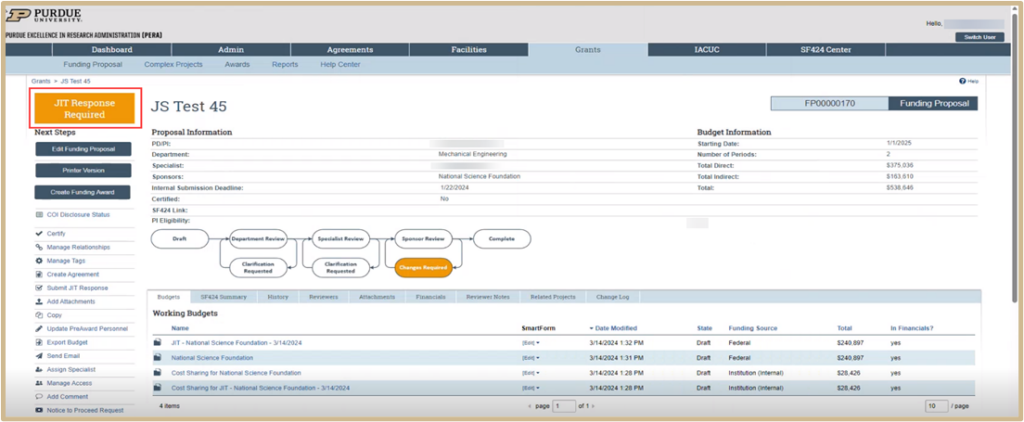
Once “ok” is selected above, the PI and Launch Team will receive an automated email notification “Post Submission Changes Requested”. The status of the funding proposal goes into “JIT Response Required.”
Step 5: Make a Copy (as needed to edit budget)
In order to make edits, as needed to the budget, the Launch Specialist will first go into the budget and then click Make A Copy. In the new window title the budget with JIT- Name of Budget- Date (xx/xx/xxxx). Once finished, click OK.

To make edits, as needed to the budget, the Launch Administrator will first go into the budget marked as included in financials “yes” and select Make A Copy. In the new window, enter the new budget name with “JIT – Name of Budget – Date (xx/xx/xxxx). Once finished, click ok.
To access the budget just copied, go back to the budget tab on the funding proposal and select the JIT budget. The JIT budget will default to be included in financials. The Launch Administrator should ensure this is marked yes. Edits can be made to the budget as needed/requested by the sponsor.
The Launch Administrator should open the final budget (submitted by Pre-Award) and edit to change question 4 “Included in consolidated budget” from yes to no. Select save and exit the budget to return to the main FP Budgets Tab. Verify that the In Financials column is only showing “yes” for the new revised JIT budget created.
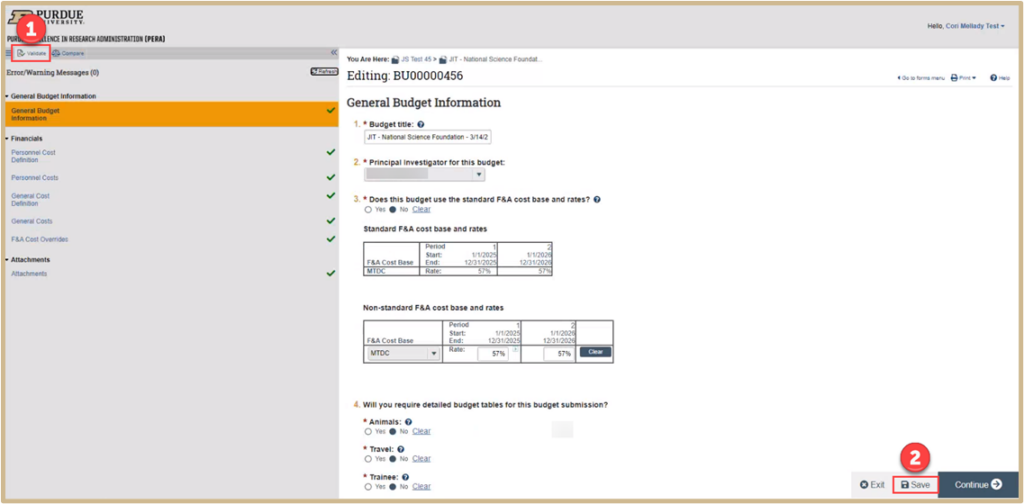
On the JIT budget, make the necessary adjustments in the SmartForm. All errors must be corrected before moving to the next step. Click on Validate and correct errors as needed until any red warning symbols become green check marks.
Once finished, click Save then Exit and return to your workplace.
Once the macro is finalized, Post Award should have access to the macro to export the JIT budget, execute/run the macro, and upload to the proposal attachments.
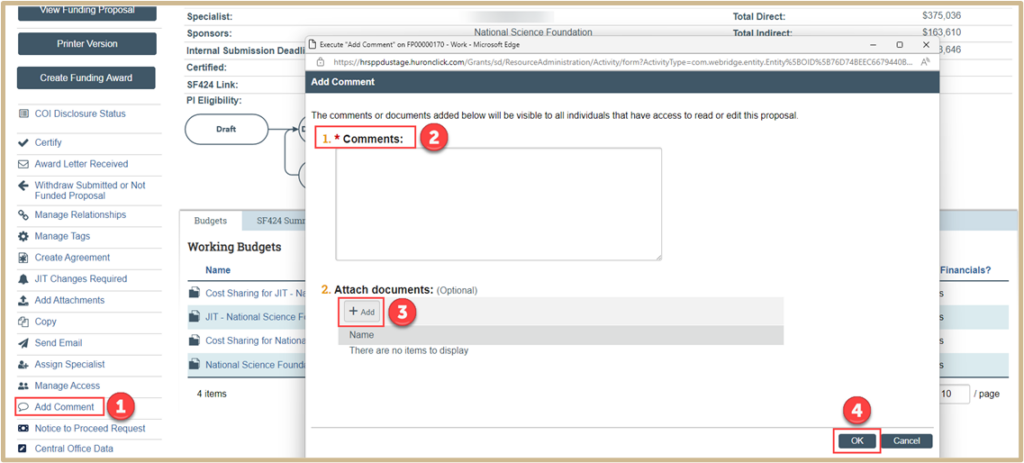
Step 6: Add comments.
The Launch Specialist should log a comment to track the activities being conducted to submit the JIT request. Examples are included below:
- JIT – Regulatory Information Needed
- JIT – Regulatory Information Received
- JIT – Comment
- JIT – Void
- JIT – To Sponsor
- JIT – To Pre-Award
- JIT – Complete
Also add documents being received and/or submitted. Once finished, click OK.
![]() NOTE
NOTE
As shown in the image below, the Funding Proposal will remain in JIT Response Required status in the Workspace until the sponsor’s JIT due date or 48 hours after JIT submission to sponsor.

Step 7: Submit JIT Response
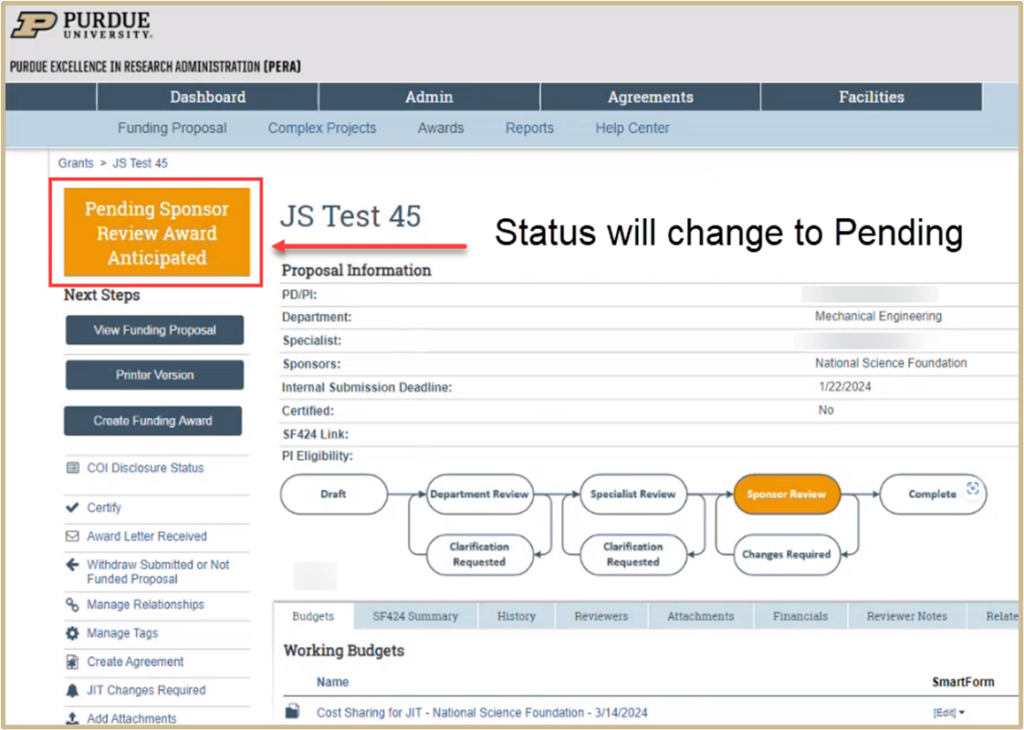
Click on Submit JIT Response. When the new window opens, type in any comments needed. Most likely an attachment will not be needed as it was added earlier in the log comments above (Step 5), but in some cases an attachment may be needed that may include the sponsor’s response/acceptance of the JIT submission. Once finished, click OK.
The status will change to Pending as show in the image below.
Content Updated:

